Amazon Connect Integration With Zoho Desk
Amazon Connect integration with Zoho Desk helps you answer all your customer support calls right inside your help desk. You can view the caller information while you receive calls from your Amazon Connect number to deliver context-aware customer service.
- See the details of the Zoho Desk contact when you receive an incoming call via Amazon Connect.
- Add a new contact for calls received from Unknown Callers.
- Calls made or received via Amazon Connect are automatically logged when you associate them with tickets.
- All unanswered or missed calls are automatically created as tickets.
Note:
- Amazon Connect integration is available only in the Professional and Enterprise editions of Zoho Desk.
- For this integration to work, you must have an Amazon Web Services (AWS) account.
- You must also have the Amazon Connect Instance configured in your AWS account.
- Only an administrator of a Zoho Desk account can enable the Amazon Connect integration.
- Once enabled, the integration is activated for all agents. Agents are required to log in to Amazon Connect with their unique credentials.
Setting up Amazon Connect Integration
To set up Amazon Connect integration, you must:
- Enable Amazon Connect integration
- Log in to your Amazon Connect account in Zoho Desk
Enabling Amazon Connect Integration
To begin with, you must enable the Amazon Connect integration in Zoho Desk.
To enable Amazon Connect integration:
- Click the Setup icon (
) in the top bar.
- In the Setup Landing page, click Phone under Channels.
- Click the Amazon Connect widget.
- In the Amazon Connect page, set your preference to be able to create tickets from missed calls.
You can create tickets for all missed calls, inbound missed calls or outbound missed calls. - Click Enable Integration.
Note:
- After clicking Enable, please wait while the page refreshes automatically. Do not click anywhere else until the Amazon Connect Login screen appears.
Log in to Amazon Connect
Once you have enabled the Amazon Connect integration, you will be prompted to log in to your AWS account from Zoho Desk.
Once you have enabled the Amazon Connect integration, you will be prompted to log in to your AWS account from Zoho Desk.
To log in to your Amazon Connect account:
- Click Login to Amazon Connect if you wish to log in to your account right away.
- Now your Zoho Desk domain should be allowed to access the Amazon Connect virtual contact center instance. You can follow the steps below to achieve this:
- Go to the Amazon Connect console.
- Click the required instance from the list of available instances.
- Click the Application Integration link under Instance Alias.
- Click Add Origin.
- Enter Origin URL as 'https://desk.zoho.com/'.
If you have a host-mapped domain, please enter the subdomain address.
(E.g., https://support.bayandco.com/) - Zoho Desk domain (https://desk.zoho.com/) will now be listed under the Approved Origins section.
- Note down the required Instance Alias name from your Amazon Console page.
- Go to the Amazon Connect console.
- Enter the Instance Alias name on the pop-up to log in with Amazon Connect.
- Click Login to Amazon Connect.
Please make sure that you have logged into the Amazon Connect instance before logging in from here.
Setting your Amazon Connect Status
The Amazon Connect status controls your availability to answer calls inside Zoho Desk. There are two statuses:
- Available: Available to make/receive calls
- Offline: Not available to answer calls
To set your Amazon Connect status:
- Click on your account Photo in the top right corner of our help desk.
- Select the status drop-down menu corresponding to Amazon Connect.
- Select Online or Offline as your phone status.
Your settings will be saved instantaneously.
Browser Calling for Amazon Connect
Browser calling allows you to make calls directly from Zoho Desk without having to use your Amazon Connect softphone. By default, your call preferences will be selected as Browser in the call preferences pop-up so that you can make calls via your browser. This also allows you to attend the incoming calls within your help desk directly.
Note:
- Hold and Unhold functionalities will be included in the pop-up if you choose the Browser option.
- Browser calling will be supported only in Chrome 29 and above and Firefox 47 and above versions.
Apart from browser calling, you can also make calls through a custom phone number depending on your requirements.
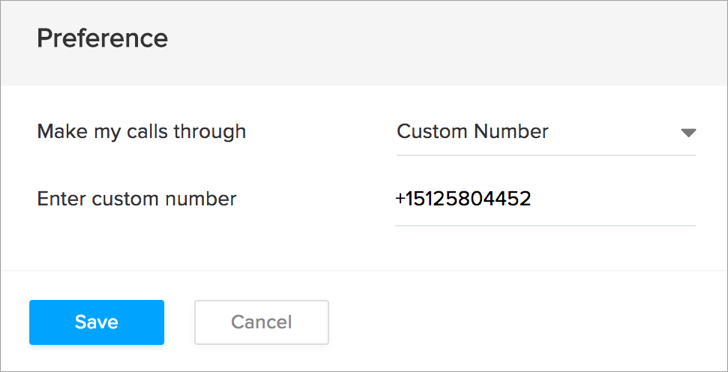
To use a custom phone number:
- Click on your account Photo in the top right corner of your help desk.
- Select the status drop-down menu corresponding to Amazon Connect.
- Select Preference from the menu options.
- Set the "Make my calls through" option as Custom Number.
- Enter your Custom Number.
- Click Save.
Disable Amazon Connect Integration
The Amazon Connect integration can be disabled at any time. Only the administrator of a Zoho Desk account can disable the integration.
To disable Amazon Connect integration:
- Click the Setup icon (
- In the Setup Landing page, click Phone under Channels.
- In the Amazon Connect page, hover your mouse pointer over the Amazon Connect widget.
- Click Disable Integration.
Note:
- On disabling the Amazon Connect integration, you will no longer be able to make calls in Zoho Desk via Amazon Connect.
- Once disabled by the administrator, the integration is disabled for all agents in the help desk account.
- Call details entered before the integration is disabled will remain intact.
Related Articles
Hosted PBX Vendors in Zoho Desk
Connect your PBX (Private Branch Exchange) systems with Zoho Desk and execute inbound and outbound calls right within your help desk account. The cloud-enabled or hosted PBX platform makes it incredibly easy for you to use the voice channel while ...Zapier App Integration with Zoho Desk
Zapier is a third-party service that connects Zoho Desk to many other apps and services, including Slack, Gmail, MailChimp, Shopify and more. It enabled you to automate your entire workflow by copying and moving your data between Zoho Desk and other ...babelforce Integration with Zoho Desk
babelforce integration with Zoho Desk helps you answer all your customer support calls right inside your help desk. You can view the caller information while you receive calls from your babelforce number to deliver context-aware customer service. ...RingCentral Integration With Zoho Desk
Unlike the regular on-premise systems, RingCentral is a Cloud phone system. It helps you to know the help desk related information about your caller and also make calls to your contacts inside help desk. Once you integrate RingCentral with Zoho Desk, ...Twilio Integration With Zoho Desk
Twilio is a cloud-enabled or hosted PBX platform which makes it incredibly easy for you to use the voice channel with your web apps. By integrating Twilio with Zoho Desk, you can organize your organization's incoming and outgoing calls from within ...