Updating your User Profile
Each agent in Zoho Desk will have a profile with some basic information about them. You can enter information like the name, contact email, picture, bio, and the like. The individual agents or the administrator can set these up in your helpdesk.
Here is the profile information that can be set up by agents:
- Name: Enter your First Name and the Last Name. Your last name will be used in all of your communication with your customers and across the helpdesk.
- Photo: Upload your picture to be displayed on your tickets, chat interface, forums and other customer touch points.
- Email: This is the primary email address of your account. It is pre-filled with that of your Zoho account. Also, it is to this email address that you will receive all of your notifications from Zoho Desk.
- Roles & Permissions: This defines your function and the related permissions that are set by your administrator.
- Department: This is the unit to which you belong to in your organization. You will be associated with at least one department to answer support tickets.
- Channel Expert: If you have expertise in one or more of the channels, specify the same. You can choose from: Email, Facebook, Forums, Phone, Web, Chat, Feedback Widget and Twitter. Choosing your expertise will help your administrators to assign relevant tickets. Also, customers can approach you when they seek help.
- Bio: Enter a short biography of your experience, expertise, or anything that you think is worth sharing with your customers. Your bio will be visible in channels like Chat, Community Forums, etc.
- Phone & Mobile: Specify your contact number. You can add both your desk phone and cell phone. Also, leave your extension if you have one.
- Language: Select the language that your would like to view your help desk. The language you choose is specific to your account.
- Country: Specify the country you work in. Based on the country locale, you can mention the language for your account.
- Time Zone: Specify your local time zone. The specified time zone will be used to time stamp the tickets in Zoho Desk. This time zone is specific to your account.
Updating Profile Information
You can update your Profile Information under Setup, in Zoho Desk.
To set your profile:
- Click the Setup icon (
) in the top menu.
- Click Personal Settings under the Customization menu.
- Update your Profile on the My Information page.
- Click Save.
Uploading Picture
You can upload your picture on the profile information page.
To upload your picture:
- Click the Upload icon (
) on the My Information page.
- Select an image to be uploaded.
- Click Save.
Please keep in mind that your picture must not exceed 500 KB and should be in one of the following formats: JPG, PNG, GIF or JPEG.
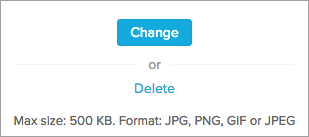
You can click Delete if you would like to remove your profile picture.
Related Articles
Managing User Profiles
In Zoho Desk, the profile function controls the permission to help desk modules, records, fields in a record, and various utilities, such as import, export, send email, etc. Agents associated with the profile can access the functions that are ...Managing User Roles
Set up the organization-wide hierarchy using Roles. Users at a higher hierarchy can always access all the records of at a lower hierarchy. For example, a Support Manager can access all the Agents' records whereas Agents can access only their records. ...What is a Profile?
Profile function controls the permission to modules, records and various utilities, such as import, export, send email, mass update etc. Support Reps associated to the profile can access the functions that are assigned to them. For more info, refer ...Agent Profile, Name Format and Signature
Each of your agents in Zoho Desk will have a profile with some of the basic information about them. A couple of these are name, contact email, picture, bio and the likes. The individual agents or the administrator can set these up in your helpdesk. ...Updating your Credit Card on File
If you pay by credit card, keeping the details updated in Zoho Desk is important. Your payments will not go through if your card on file has expired or invalid. Also, failed payments may cause your account to be moved to the Free plan. Note: Only ...